
Manage the entire customer lifecycle in one place by connecting multiple Dock workspaces.
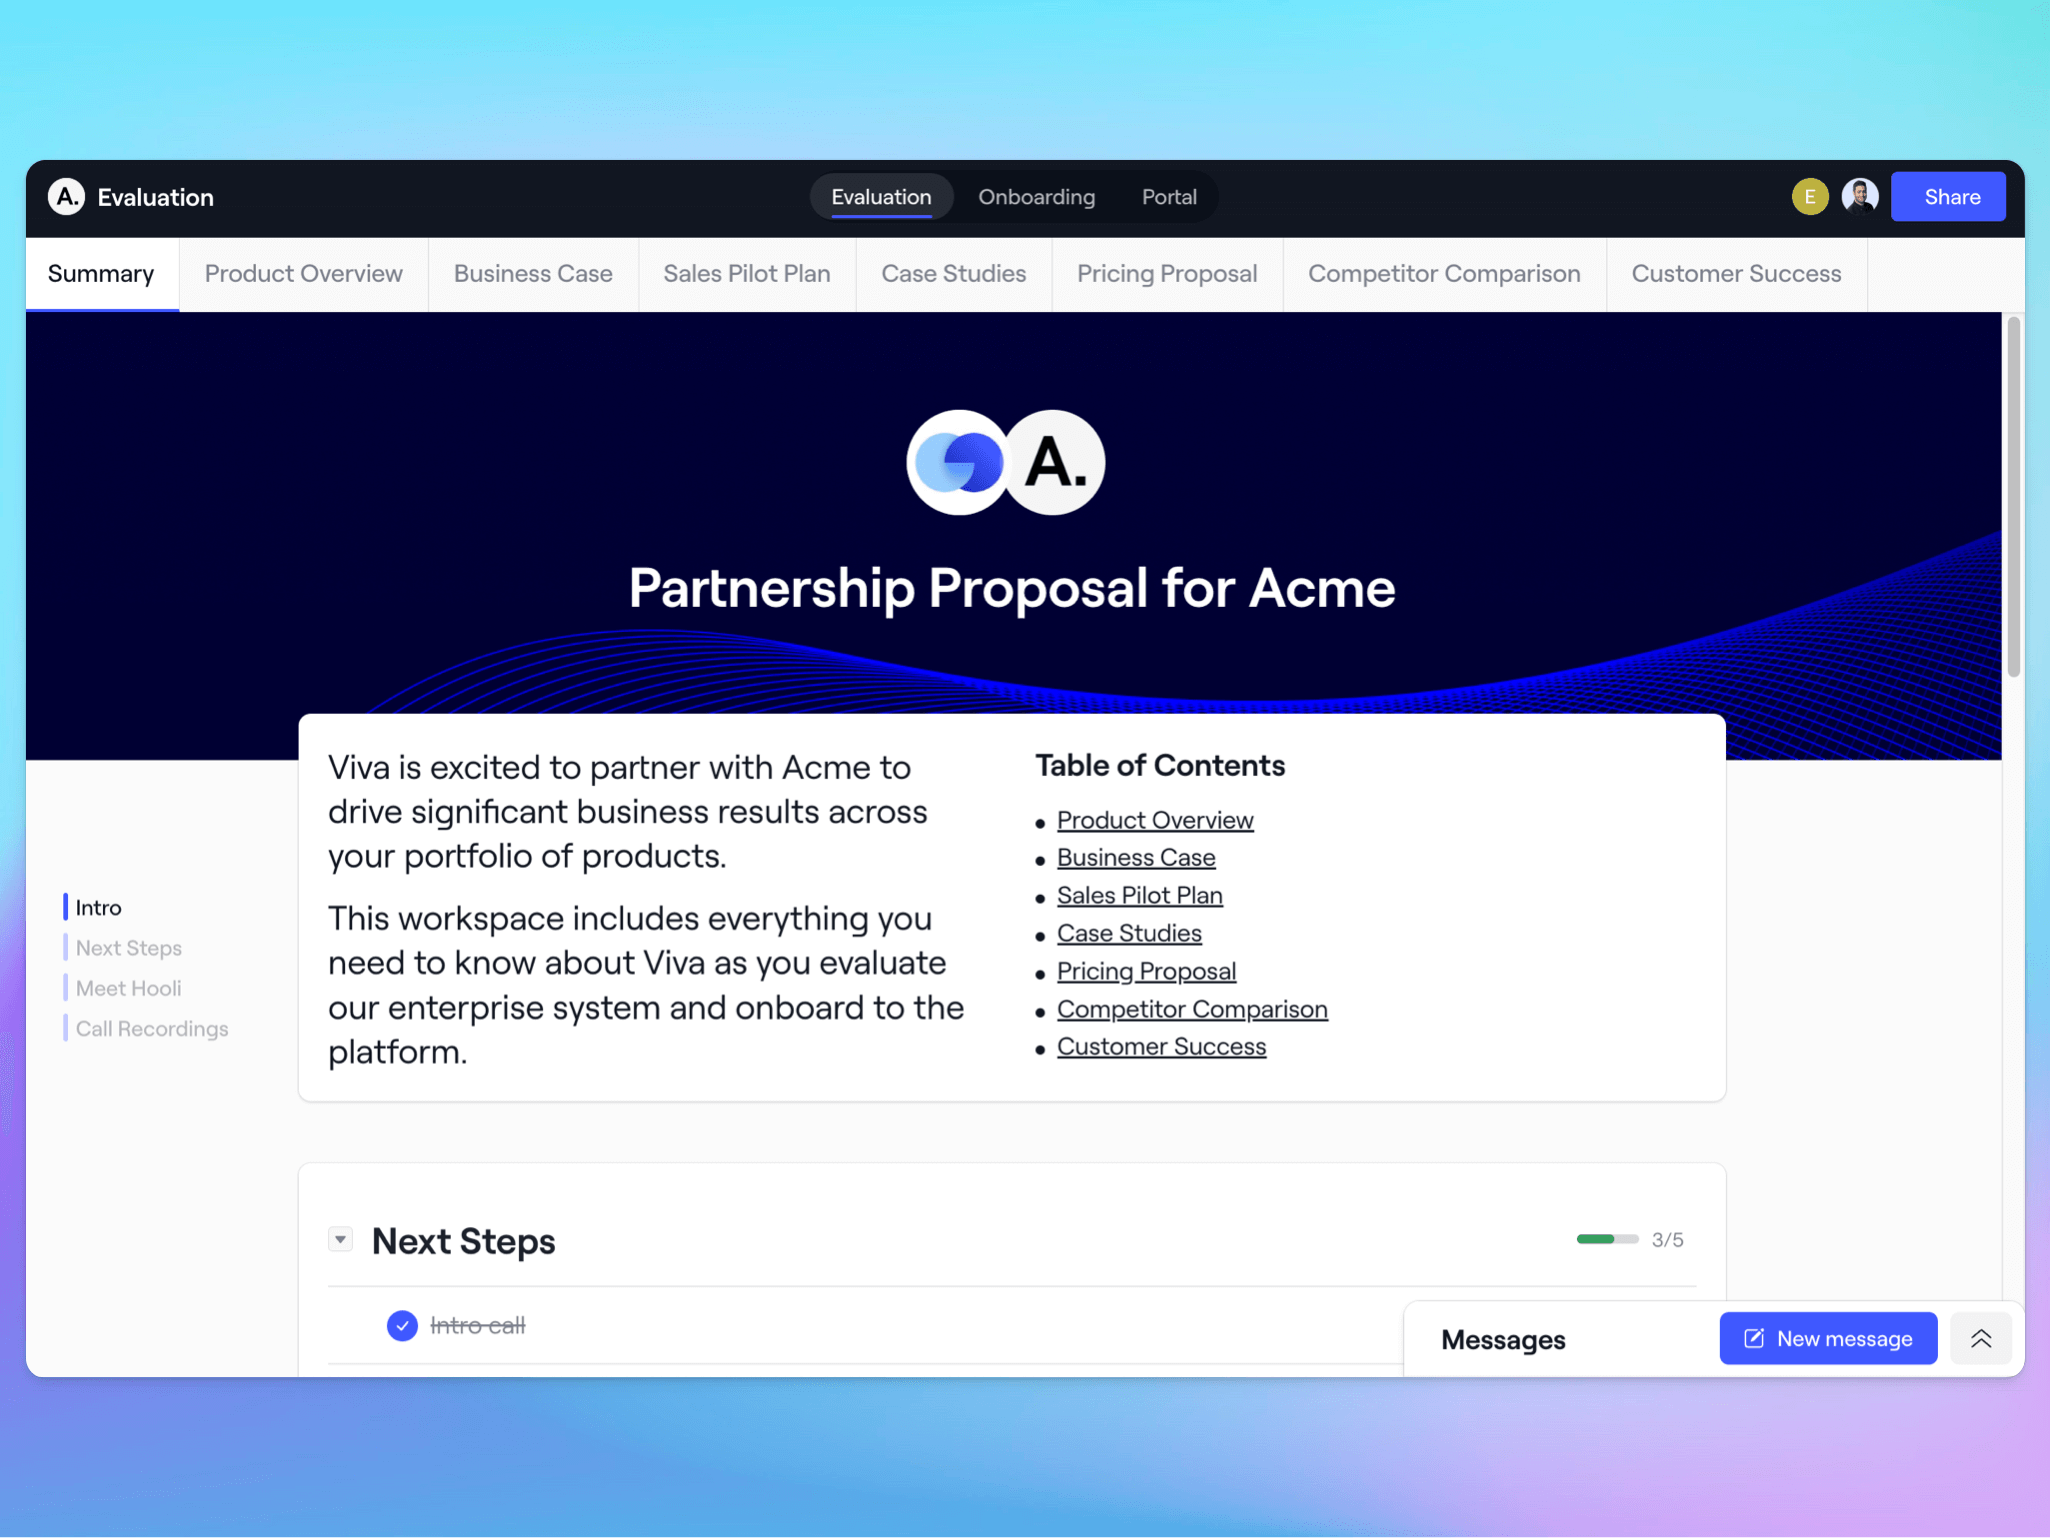
You can now connect multiple Dock workspaces to offer one continuous experience for a client from the same link.
That means you can combine your sales deal room with your onboarding plan, client portal, and any other workspace—all in one place for your customer.
For your team, you’ll be able to see all a client’s workspaces in one place.

This makes for an incredibly smooth transition between the sales and onboarding process for both your customer and your team.
Connected Workspaces are only available on the Growth & Enterprise plans.
Why would I want to connect workspaces?
We expect the two biggest use cases for connected workspaces to be for multiple phases in the customer lifecycle or multiple projects with a single client.
Instead of sending multiple workspace links or creating one massive, overwhelming workspace, you can create separate workspaces and link them together.
For example, a B2B SaaS product could connect three workspaces for:
- Evaluation
- Onboarding
- Renewal
Or a marketing agency might want to connect different projects:
- Website Build
- Communications Retainer
- Advertising Creative
This gives customers everything they need in one place without overwhelming them with multiple links, files, and documents.
How to connect workspaces
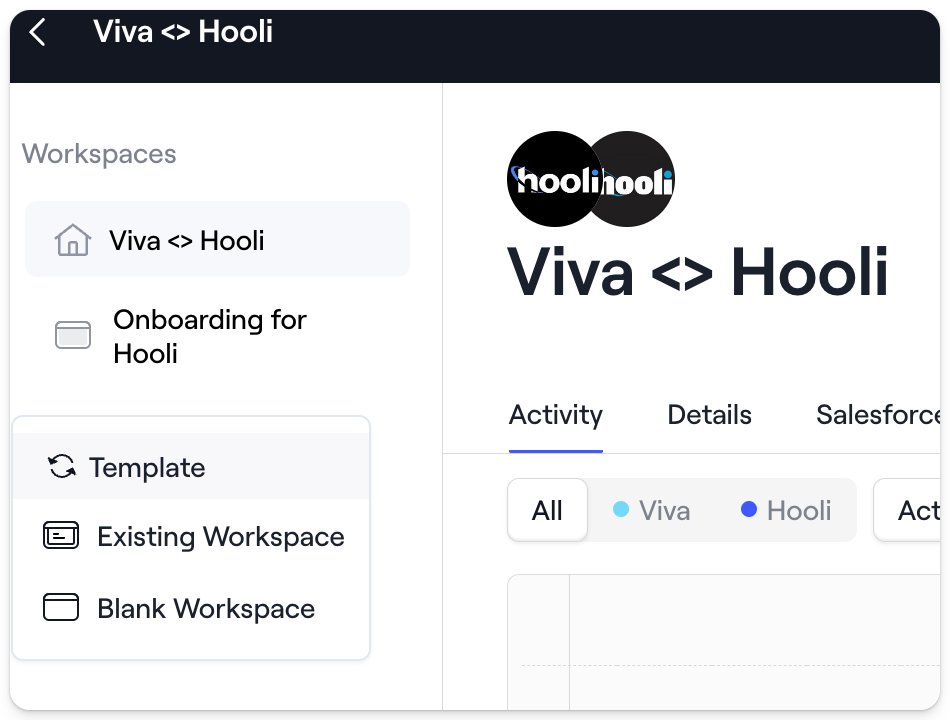
Connecting workspaces is easy. On the Internal tab of a workspace, look for Workspaces on the left nav bar, and click Add Workspace.
You can create a new connected workspace from a template or connect an existing workspace you’ve already made for the client.
When connecting a workspace, you can choose from:
- Template
- Existing Workspace (from the same account)
- Blank Workspace
Check out our Help Center to learn more about setting up Connected Workspaces.
Workspace Settings
You can control how connected workspaces appear from the Workspace settings dropdown.
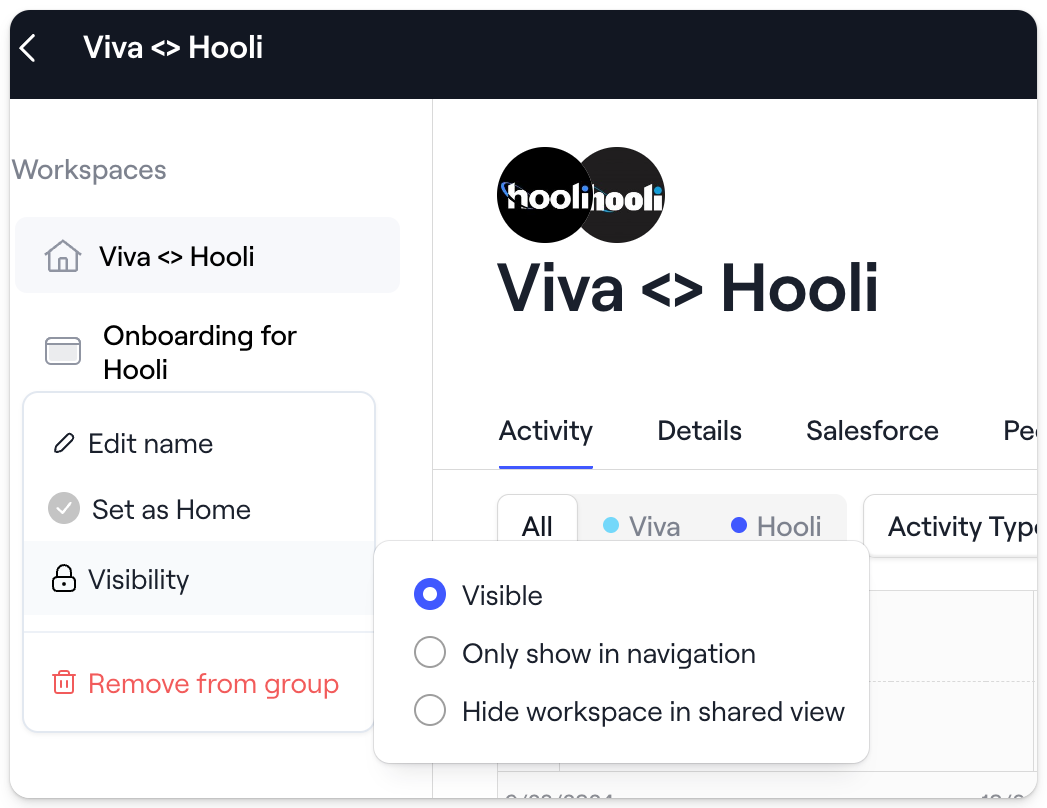
Set as Home
This is the default workspace a client lands on. We recommend the lifecycle stage the account is currently in.
Visibility
Choose how you want a space to be seen by a client.
- Visible: An external viewer can see and visit the connected workspace
- Only show in navigation: An external viewer can see the connect workspace exists, but can't click in to see the actual content.
- Hide workspace in shared view: The workspace exists for you (the internal Dock user), but the client doesn't see it.

Check out our Help Center to learn more about Connected Workspace Settings.
Connected Workspace Permissions
You can still control the permissions for each connected workspace.
By default, connected workspaces will have the same Share (i.e. access) settings across the group. For example, if you set one workspace to be gated by email or domain, all the connected workspaces will have that restriction.
But each workspace can have unique people attached, both internally and externally. For example, a sales room may have certain buyers that aren't involved in the onboarding stage.
You can control each workspace’s permissions from the Share or People menu.
For more information on configuring permissions, check out our Help Center.
Learn more in our Help Center
For more details on connecting workspaces, check out Connected Workspaces in our help center.
Connected Workspaces are only available on the Growth & Enterprise plans. To upgrade your plan, request a demo from our sales team or reach out to us at support@dock.us.


Related Revenue Lab Articles


.jpg)


Templates for Sales, Onboarding,
Projects and Portals
Customize and share with clients


