We’ve made lots of updates that make it easier to upload, manage, and track customer-facing assets in your Dock Content Library.
If you just want the TL;DR, here are some recent updates we’ve rolled out to Content Management in Dock.
- New Boards & Collections layout: We’ve rearranged the Library layout to make it easier to organize your assets.
- New Files layout: We’ve given you a more robust at-a-glance view of your list of assets and more sorting options.
- Bulk edit Library assets: Select multiple files to delete them or add them to a collection.
- Replace Library assets: Swap out an asset with a new version to have it automatically update everywhere it’s been shared.
- Bulk upload Library assets: Upload multiple files from your desktop or Google Drive.
When we launched Content Management in Dock exactly one year ago, our goal was to create an asset management system for small and mid-sized revenue teams.
Most other content management systems on the market are part of bloated enterprise-grade sales enablement platforms that are (a) prohibitively expensive, and (b) overloaded with complicated features. These tools are designed primarily for sales training at massive companies, and it just takes too many clicks for a Sales or Success rep to find an asset.
Most teams don't need these bloated systems. They need something simple, like Dock.
Dock is also a great content management alternative for smaller teams that are currently using Google Drive or Notion to manage their customer-facing assets. These tools were designed for internal-facing file sharing—not sharing assets with customers—so they're missing a lot of basic content management functionality.
We've rolled out a bunch of recent updates that make it even easier for revenue teams to find an asset, share it with a customer, and then track engagement.
Here's what's new in Dock.
New Boards & Collections layout
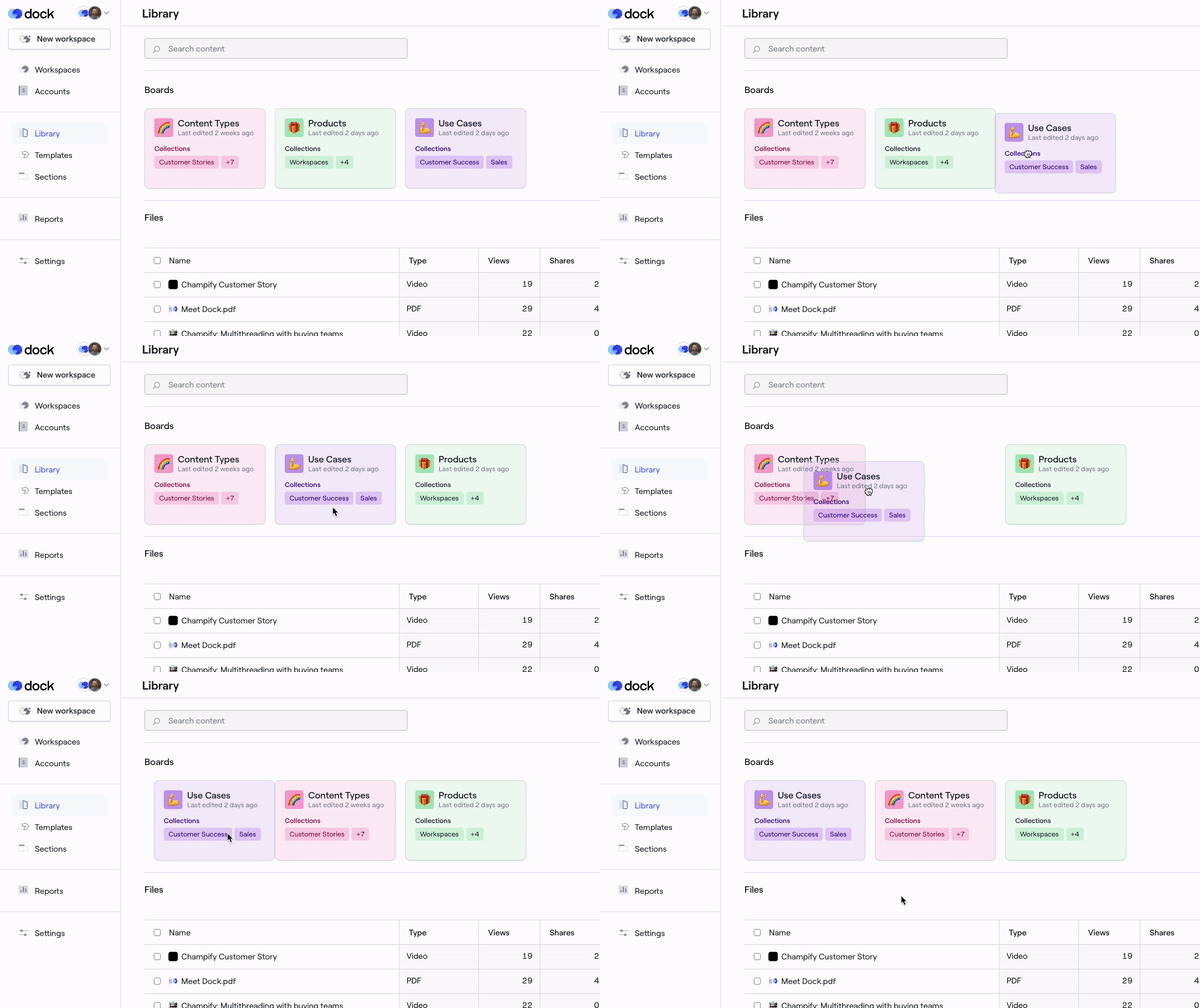
We’ve rearranged the layout of the Library to make it easier to view and manage your boards and collections.
As a quick reminder, your customer-facing assets can be organized into a two-level hierarchy of boards and collections. For example, internally at Dock, we have a collection of assets for each of our products (e.g. Workspaces, Order Forms, Content Management). All of those collections are nested under one board called Products.
So, what’s new here?
When you go to your Library in Dock, boards are now at the top, and collections are in a sidebar on the right. This makes it a lot easier to see all your boards and collections at once or create new boards and collections.

This is fun too: you can drag-and-drop boards and collections to reorder them.
New Files layout and better sorting options
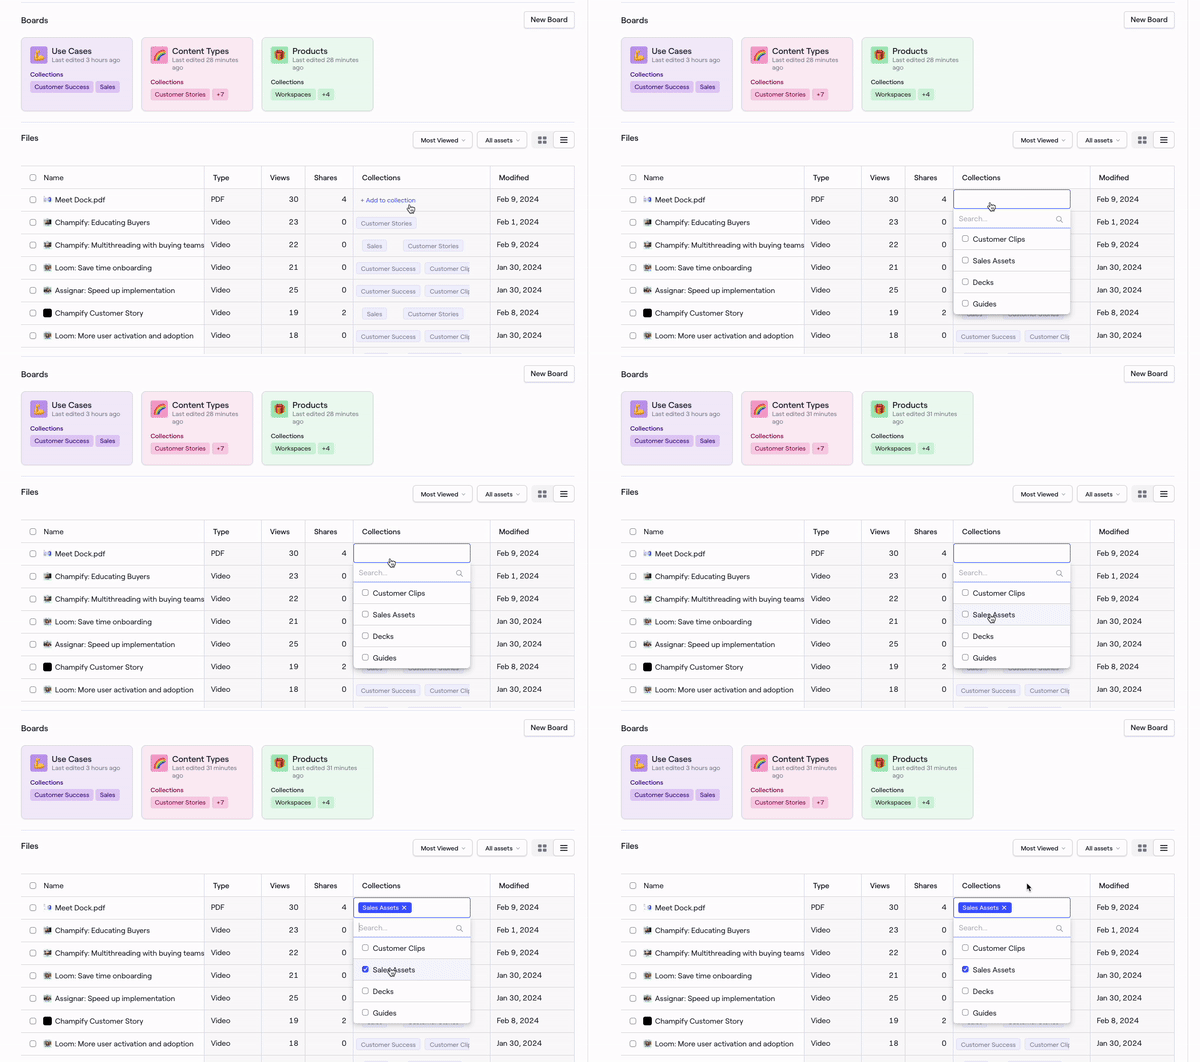
We’ve also given you more ways to see and sort all the files (i.e. assets) in your Library.
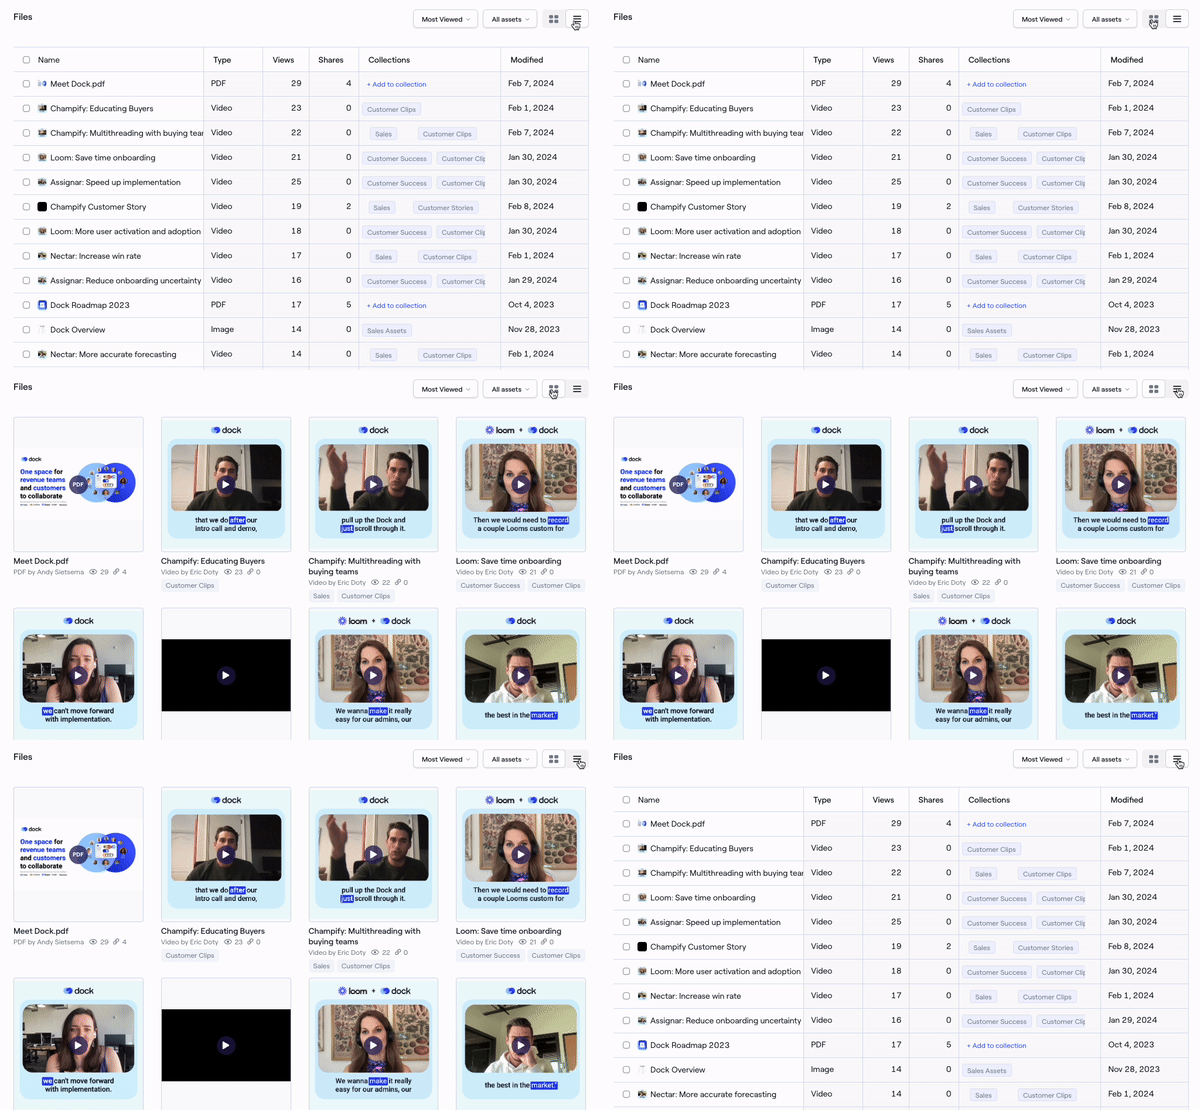
You can toggle between a thumbnail and a list view of your files.
You can sort files by recently modified, most shared by your team, or most viewed. This is useful for seeing which assets are being used most (or least) across your team.
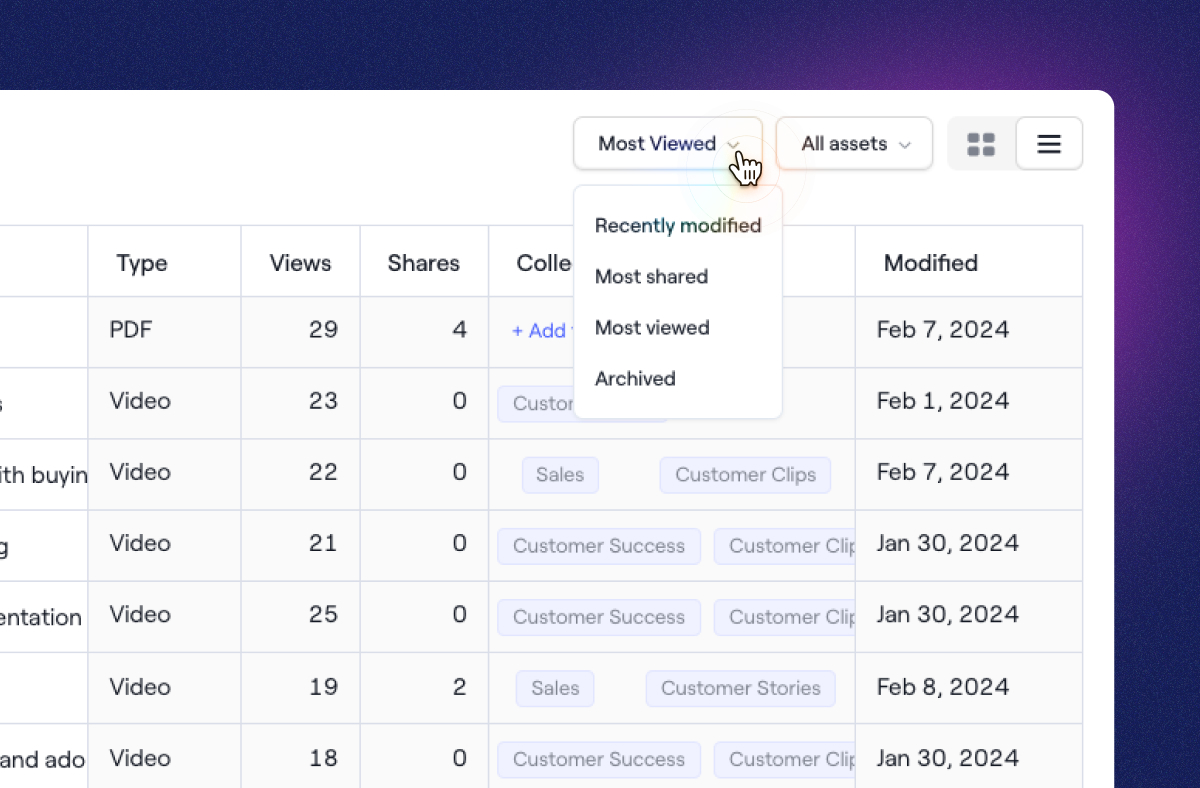
You can also see an at-a-glance view of each asset’s filetype (PDF, video, image, or link), views (by customers), and shares (from reps). You can also filter assets by their filetype.
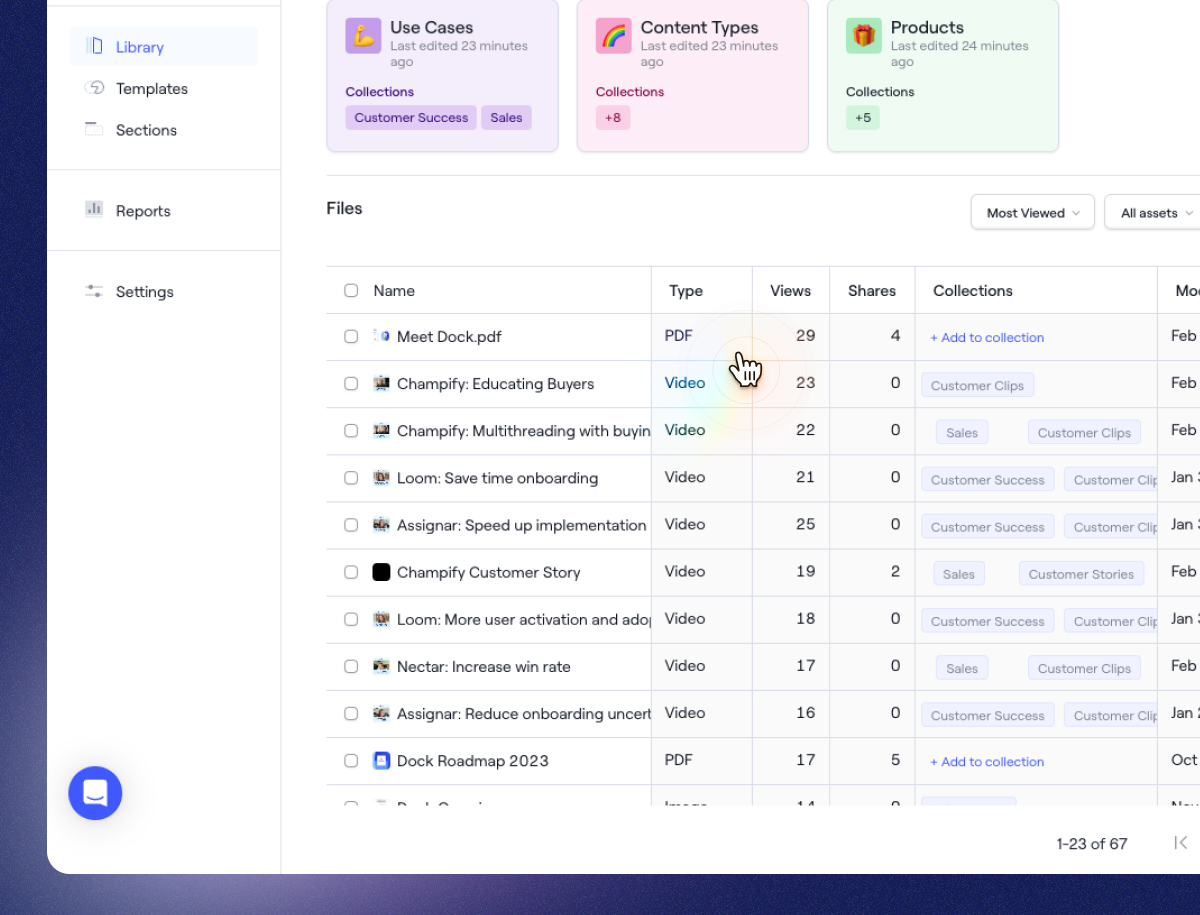
You can also add a file to a collection in-line, from the Collections column.
Bulk edit Library files
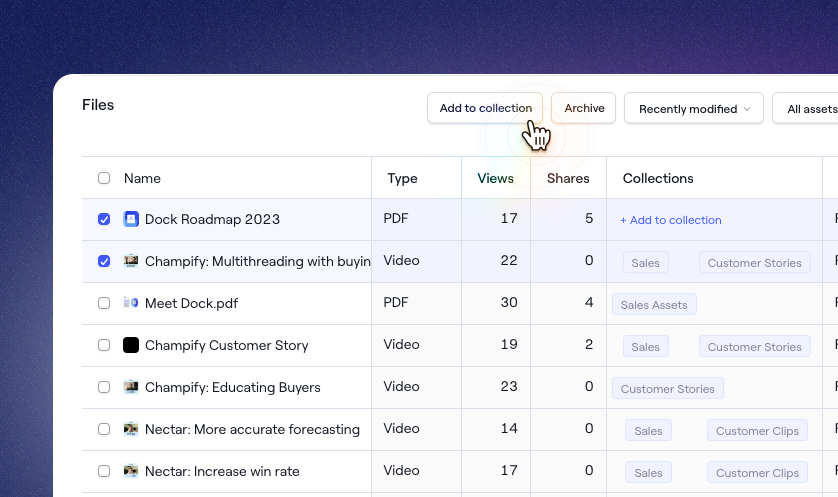
You now bulk edit files from the main Library page too. Just select multiple files from your files list to:
- Add them to a collection, or
- Archive them
Replace Library files
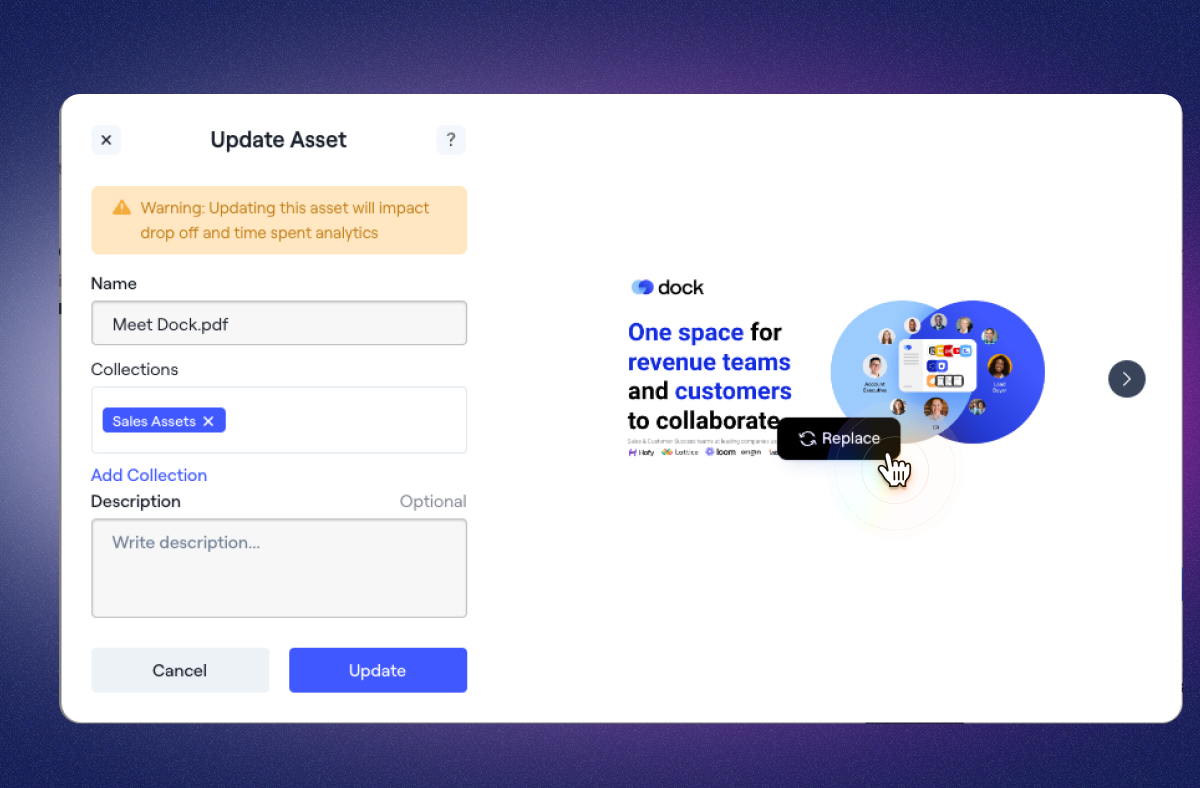
You can swap out any existing file in your library with a newer version and have it automatically update everywhere it’s been shared — whether that was directly as a link or within a customer workspace.
This is great for updating a sales deck or sharing your most up-to-date product demo video without having to update it in several places.
To update an asset, just navigate to the asset in the library, click the ‘...’ and select Update Current Asset. From there, you can hover over the asset to replace it.
Reminder: you can also re-sync any asset that was uploaded through our Google Drive integration.
Upload files in bulk
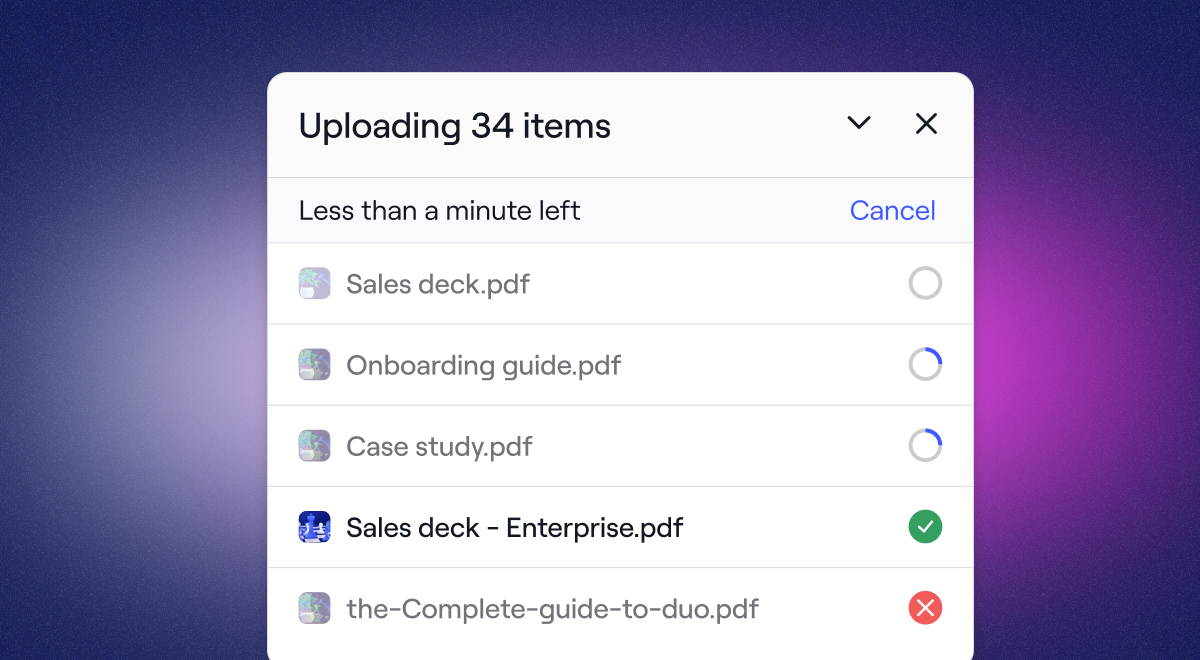
You can now bulk upload files from your desktop or through our Google Drive integration. Previously, you could only upload one file at a time.
To bulk import files from Google Drive, just go to New content > Google Drive, and use CTRL/CMD + click or Shift + click to select multiple files.
With lots more coming soon
All of these updates set the stage for our next round of updates to the content library, which includes better reporting on asset usage. I’m excited to share those with you soon!
- Alex


.jpg)


